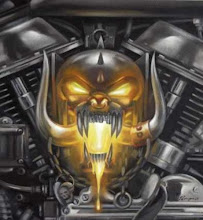
Where do I begin? Here are some thoughts/ideas I have on what I'd like to accomplish this winter with the bike. As I've been saying, I want to convert the Motörheadster into a hard tail and the way I look at... I have three options.
Here's a weld-on hard tail right out of the box. It's really straight forward... bolt on the bottom, weld on the top.
And here's what it looks like after it's welded on (this one is a Nasty Bike W/O). The battery tray is there but there's no oil tank.
And here's the finished look. A hard tail Sporty with the original VIN and it's "strong like bull"!
This is Led Sled's weld-on.
It's a little different in that you have to remove good a portion of the back bone (all but cutting the frame in half) and then insert and weld-on the bottom & top.
See what I mean.
It's a lot more work. Here she is on a donor bike. As you can see it also stretches the bike out as well (that means I'd have to convert to a chain = more $$). Honestly, I don't think it's the route I'll take.
Option #2 - Design and make/weld/fabricate my own hard tail using the existing swing arm as a jig.
Easy as pie! In this pic above the guy left the swing arm in place and simply eliminated the top rear section of the frame and seat portion with the shocks. I had thought about doing this but I'm not a big fan of leaving the battery on the side like that. Here's what I'm talkin' bout'. On the floor on the left is the old swing arm. All he used was the end piece of the swing arm for the axle, spacers and adjusters.
Option #3 - is to buy a full frame.
Both of the above bikes are Bone Shaker Choppers builds. Sweet frame and struts! It's what they do... and they do it right! There are other frame builders out there like Nasty Bikes, Sucker Punch Sallys, Led Sled and Bitter End.

The top pic is a Nasty frame. The red bike is an SPS frame. Very clean. They also make sweet fenders, and kick a$$ struts.
Here's Led Sled's frame. I do like the looks of it, it's length and the goose neck.
Redneck Engineering is another company that specializes in Sporty frames. Check out their mono-shock frame. Not me. I think I'll just chop mine up.
As for a fender, here's a few styles and options I'm looking at.
In my HO, Nash Bro. Motorcycles design and build some of the sweetest looking rear fenders out there. Throw on a small sissy like the one above and you got a winning combo. I'm hopin' to find/build some thing like that.
This ridge back fender is nice!
I also like the curved struts. He's runnin' a Flyrite frame as well.
I'm not a big fan of the flat fenders but I may end up buying one. It all depends on what I find in the auto salvage yard or swap meets.
 This is also a wicked concept... incorporate the tail light into the fender.
Time to illuminate the subject. Here's a Caddy Light and bracket.
An old school bullet & a model "A".I don't mind this tail light set up (3-in-1). I've seen it in the J&P catalogue but this is the first time I've seen it on a scoot. Not bad! The bike is from G&L choppers. They're an XS-650 crew and also make a slick rear fender. I just love those crown caps! Nutin' but Kustum! But I don't NEED one... I just want one.


This cannon ball oil tank however, is SIC! It's made by south side kustoms. Man if I have the beans, I'll buy one... but it's not in the plans as of yet. I may just buy a basic tank for under $100.

That's from the Led Sled gold bike above. Wow, that's a wicked cool oil tank.
As for an air cleaner, I may just build my own or I may look at an S&S cover but not the carb kit.
I also love that ol' Skool screen or even a 2" velocity stack.
This style of pipes caught my eye, but it'll all depend on where my master cylinder is positioned. His is a little higher and to the rear. They don't really say... 'bobber', though and I'm not sure what I want to do.

Here's a 2-into-1 set that I'm leanin' towards. This pic will give me a good idea of what my bike will look like with those pipes and a hard tail.
That's about it. Don't know when I'll start choppin. I'm still hopin' to ride, it's only mid-October... if the snow melts, it may warm up to +5c!?!?
Ace ♠