
The bottom line is if you think you can do it and you've had even a little experience painting... then go for it. Rattle cans of flat and semi-gloss black from the hardware store, painters tape and a shop heater to keep the garage warm and I went to town. That's right I painted the bike myself. It wasn't that difficult given Harley-Davidson did the original base coat, all I did was paint the panels on the tank and rear fender and the striping.

The air cleaner was very easy. I just sanded it and sprayed it. Two or three coats of flat black paint and a couple of clear and I was done.

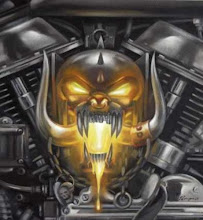
I covered the Harley logo, then painted the plastic cover and pin striped it.
The tank was a little more difficult but I applied the same principals. I taped off the panel sections on each side (I just eyeballed it and got lucky - I recommend measuring to make each side equal & using a cardboard or plastic template), sanded them down and then primed and painted.

Again, two or three coats of paint but this time no clear... I wanted that real raw, flat black look. And it came out perfect. It looks (in my opinion) incredible!

I wasn't sure how to place the decals. This time I decided to measure and try and place them in similar spots on their respective sides. If you look at them close enough and long enough (as I have) I think they could go up a millimeter or so, but who cares.

Awesome.

Thanks to Rotten Remains (eBay) for the incredible decals.
 Here is where I screwed up. The pinstripe wasn't long enough on the bottom, so I cut a small piece and overlapped it on the lower stripe and tried to pull it to the top. It didn't work all that well, but I'll change it in the winter.
I have never used, attempted or had any experience with pin stripping, but it seemed to be fairly straight forward. If you screw up, rip it off and do it again. It's quite cheap and you can pick it up from the local auto shops.
This is the sprocket cover.
The rear brake pedal is upside down, so it looks a little wonky. Because it's aluminum, cutting it was a breeze. I took it off, popped it into the vice and took the saws-all (reciprocating saw) to it and it was like a knife going through butter!
 I only wanted to cut a section off it because I needed to mount the master cylinder.
Here is a picture of the rear fender after the tape and all the masking came off. I left it on the bike to paint it. I masked off the sides and both ends (took off the rear light and seat) and just let her rip.
Again I wanted the fender to match the tank so there is no clear. It looks lean, clean and mean!

Here is a look down the fender, I'm proud of how straight it is. I did measure up from reference points on the side but for the most part I just eyeballed her!

All that was left was put the seat back on. Done.
 Here Is the Motorheadster after a few rips up and down the street. Shes a little dirty and yup... I lost one of the old license plate screws. Oh well, another winter project. That's right, the riding season's too damn short to worry about a screw and nut (well, I'll probably find one in the garage and put it in sooner rather than later).
 Ace ♠


No comments:
Post a Comment